YubiKey TokenSource
2019-08-22Google Cloud Credentials source for Service Account keys embedded within a Yubikey PIV.
WARNING:
YubiKeyTokenSourceis highly experimental. This repo is NOT supported by Google
google/oauth2/YubiKeyTokenSource is a variation of google/oauth2/JWTAccessTokenSourceFromJSON where the private key used to sign the JWT is embedded within a PIV-enabled YubiKey.
The private key in raw form not exportable or exposed to the filesystem or any process other than through the Yubikey interface. This token source uses the yubikey alone to sign the JWT which is then used to access a Google Cloud API.
This library uses go-piv which is a go-native interface to yubikey (vs wrapper around C). To use this library, install PSCS Lite libpcsclite-dev
The default installation steps here first creates a service account private key that will get imported into the yubikey. It is expected that you discard/destroy the private key at that point so that the only copy is on the Yubikey.
However, the better way is to only generate the private key on the Yubikey and then export its CSR. From there, use your own CSR to sign it to generate a cert. Import the cert back into the yubikey at slot 9c. Once all that is done, you can import the signed certificate back into GCP and associate that with a service account. For more information on the last part, see Uploading public keys for service accounts. This repo does not show these steps and just takes the lazy way out.
You can find the source here
Usage
-
Prepare Yubikey for Key import
First embed a GCP Service Account file as a combined
x509certificate within a YubiKey.You must have a YubiKey Neo or YubiKey 4 or 5 as thoese keys support embedded keys.
You are free to provision the key by any means but for reference, the following uses:
On any other system, install supporting libraries for both components listed above.
Check Yubikey is plugged in
$ lsusb  | grep -i yubikey
Bus 001 Device 013: ID 1050:0111 Yubico.com Yubikey NEO(-N) OTP+CCID
Launch the
ykman-guiUI Application, it should also show the type of key you are using. We will useykman-guilater to import the keys. -
Extract Service account certificate file
Download a GCP Service Account **in .p12 format".
Remove default passphrase (
notasecret), generate anx509file for importing into the YubiKey.openssl pkcs12 -in svc_account.p12 -nocerts -nodes -passin pass:notasecret | openssl rsa -out privkey.pem openssl rsa -in privkey.pem -outform PEM -pubout -out public.pem openssl req -new -x509 -key privkey.pem -out public.crt Use CN=<your_service_account_email> openssl pkcs12 --export -in public.crt -inkey privkey.pem -outform PEM -out cert.pfx -
Embed Service Account within YubiKey
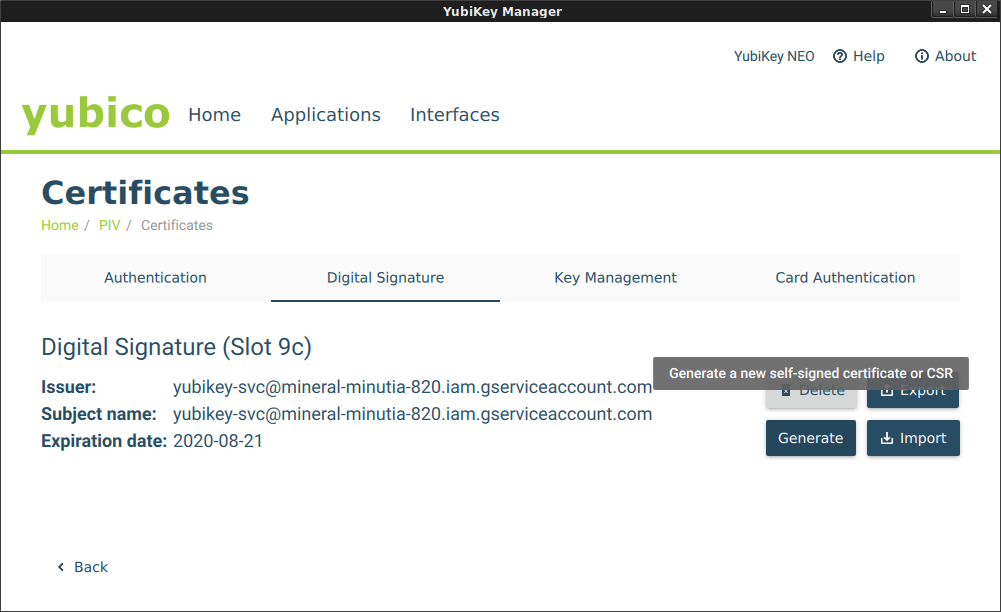
Launch
yubikey-manager-qtand navigate to theDigital Signature(9c). (see Certificate Slots) Import the certificatecert.pfx. If this is a new Yubikey, just use the default PIN and Management Keys provided.You should see a loaded certificate:
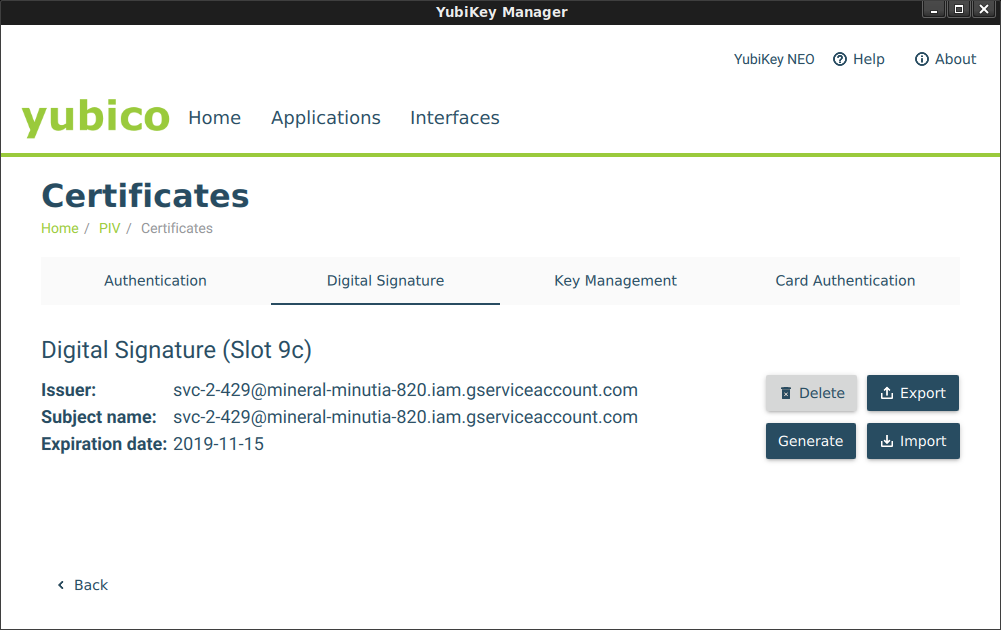
You can verify certificate load Status by running the
yubico-piv-tool:$ yubico-piv-tool -a status Version: 1.0.4 Serial Number: -1879017761 CHUID: 3019d4e739da739ced39ce739d836858210842108421c84210c3eb34109acae3dbacb7f8b5295a1be28d916b2c350832303330303130313e00fe00 CCC: No data available Slot 9c: Algorithm: RSA2048 Subject DN: C=AU, ST=Some-State, O=Internet Widgits Pty Ltd, CN=svc-2-429@project.iam.gserviceaccount.com Issuer DN: C=AU, ST=Some-State, O=Internet Widgits Pty Ltd, CN=svc-2-429@project.iam.gserviceaccount.com Fingerprint: 5726b54b6b50d737307a9ec09c0fc857258e23e7c05acf3f4d28cb3a2f37056b Not Before: Oct 16 05:09:20 2019 GMT Not After: Nov 15 05:09:20 2019 GMT PIN tries left: 3And also verify sign/verify steps:
$ yubico-piv-tool -a read-certificate -s 9c
-----BEGIN CERTIFICATE-----
...
-----END CERTIFICATE-----

$ yubico-piv-tool -a verify-pin -a test-signature -s 9c
Enter PIN:
Successfully verified PIN.
Please paste the certificate to verify against...
-----BEGIN CERTIFICATE-----
...
-----END CERTIFICATE-----
Successful RSA verification.
Alternatively, you can generate a private on the Yubkiey, gen a CSR, sign it with your own CA, then associate it with the service account
-
Install
libpcsclite-devon target systemOn any system you wish to use this library, you must first install
libpcsclite-dev:sudo apt-get install libpcsclite-devInsert the YubiKey and verify its detected:
$ lsusb | grep -i yubikey Bus 001 Device 013: ID 1050:0111 Yubico.com Yubikey NEO(-N) OTP+CCID -
Use TokenSource
After the key is embedded into the yubikey, you can DELETE any reference to
private.pemor the.p12file (the private key now exists protected by the physical access to the yubikey).The YubiKey based
TokenSourcecan now be used to access a GCP resource using either a plain HTTPClient or native GCP library (google-cloud-pubsub)!!package main import ( "log" "net/http" "cloud.google.com/go/pubsub" "golang.org/x/oauth2" sal "github.com/salrashid123/yubikey/google" "google.golang.org/api/iterator" "google.golang.org/api/option" ) func main() { yubiKeyTokenSource, err := sal.YubiKeyTokenSource( &sal.YubiKeyTokenConfig{ Email: "svcAccount@project.iam.gserviceaccount.com", Audience: "https://pubsub.googleapis.com/google.pubsub.v1.Publisher", Pin: "123456", }, ) // tok, err := yubiKeyTokenSource.Token() // if err != nil { // log.Fatal(err) // } // log.Printf("Token: %v", tok.AccessToken) client := &http.Client{ Transport: &oauth2.Transport{ Source: yubiKeyTokenSource, }, } url := "https://pubsub.googleapis.com/v1/projects/YOURPROJECT/topics" resp, err := client.Get(url) if err != nil { log.Fatalf("Unable to get Topics %v", err) } log.Printf("Response: %v", resp.Status) // Using google-cloud library ctx := context.Background() pubsubClient, err := pubsub.NewClient(ctx, proj, option.WithTokenSource(yubiKeyTokenSource)) if err != nil { log.Fatalf("Could not create pubsub Client: %v", err) } it := pubsubClient.Topics(ctx) for { topic, err := it.Next() if err == iterator.Done { break } if err != nil { log.Fatalf("Unable to iterate topics %v", err) } log.Printf("Topic: %s", topic.ID()) }Note: by default the Yubikey allows for 3 PIN attempts before going into lockout. To unlock, see PIN and Management Key
If you do not have the Yubikey Plugged in, you may see an error like this
error: SCardListReaders failed, rc=8010002e
2019/10/16 07:33:10 Unable to open yubikey ykpiv ykpiv_connect: PKCS Error (-2) - Error in PCSC call
Some notes:
- Slot 9c: Digital Signature is reserved for Digital Signatures)
- The default PIN for access is
123456. The default unlock code is12345678.
See previous article about using the Yubikey NEO with GPG decryption Encrypting Google Application Default and gcloud credentials with GPG SmardCard. The distinction here is that the RSA signing happens all onboard.
This site supports webmentions. Send me a mention via this form.